
Removing usage traces from a Windows computer
Step-by-step guide to removing your traces on Windows 10 / 11
Windows keeps many traces of how a computer is used. When selling it, donating it, handing it to another user or simply for privacy reasons, it is useful and important to know how to remove them.
This data is not visible at first glance, but it is very much there.
This article explains:
- where Windows stores these traces,
- how to remove them manually,
- which reliable tools to use,
- and the limits and risks you should be aware of.
1. What traces does Windows keep?
User-related traces
- Recently opened files
- Launched applications
- Jump Lists
- Software caches
- Recent documents
System traces
- Event logs
- Program launch history
- Device traces (USB, drives)
- Update logs
Network and browsing traces
- Browser cache
- DNS cache
- Wi-Fi history
- Local network data
⚠️ Important: system logs do not contain a detailed list of the user’s actions (clicks, opened files), but technical events related to how Windows runs.
2. Key locations to know
⚠️ These locations may contain temporary files but also data that software needs.
Deleting everything without discrimination can cause malfunctions.
User folders
%USERPROFILE%\AppData\Local\
%USERPROFILE%\AppData\Roaming\
Temporary files
%TEMP%
%USERPROFILE%\AppData\Local\Temp\
Application prefetch
C:\Windows\Prefetch\Recent files history
%USERPROFILE%\AppData\Roaming\Microsoft\Windows\Recent\
%USERPROFILE%\AppData\Roaming\Microsoft\Windows\Recent\AutomaticDestinations\
%USERPROFILE%\AppData\Roaming\Microsoft\Windows\Recent\CustomDestinations\
System logs (via Event Viewer)
Unlike the folders listed above, system logs are not folders you can reach in File Explorer.
They can only be viewed and cleared through the Windows Event Viewer.
Logs concerned:
- Application
- Security
- System
- Setup
👉 These logs record the history of errors, sign-ins and system events.
3. Manual cleanup (without third-party tools)
3.1 Windows Disk Cleanup
Before using third-party software, remember that Windows has built-in tools that can efficiently clean out temporary and unnecessary system files.
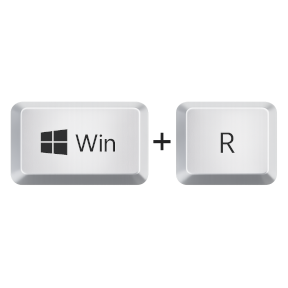
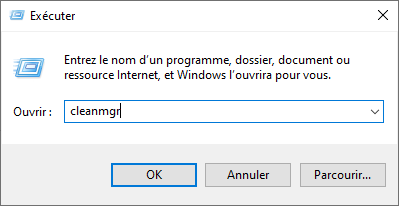
Win + R cleanmgr
OK
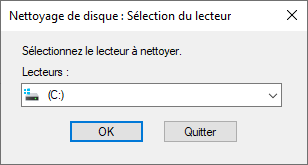
If Windows asks, select the drive you want to clean.
It is usually drive C:.
Confirm by clicking OK.
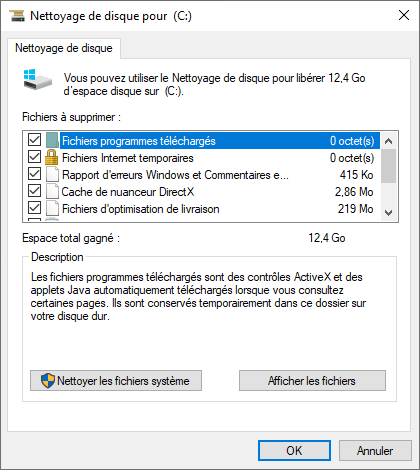
Screen: Disk Cleanup for (C:)
Explanation:
This first window is a basic Windows cleanup.
It mainly lets you delete:
- temporary files,
- Internet caches,
- simple error reports.
This cleanup is useful, but limited.
Recommended action:
For a more thorough cleanup, click “Clean up system files” (button at the bottom left).
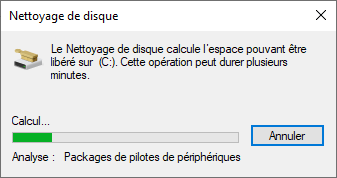
Screen: Calculating how much space can be freed
Explanation:
Once you have selected the drive (usually C:), Windows runs a scan to identify the temporary and unnecessary files that can be deleted.
This scan only covers the standard cleanup and requires no action from the user.
Simply wait for the scan to finish.
Screen: Scan after “Clean up system files”
Explanation:
This screen only appears after you have clicked the “Clean up system files” button in the previous window.
This restarts the cleanup tool with administrator rights, giving access to additional items that are not visible in the standard cleanup.
This step is deliberate and is used to carry out a more thorough system cleanup.
Recommended to tick:
- ✅ Windows Update Cleanup
- ✅ Temporary files
- ✅ System error memory dump files
- ✅ Windows error reports
- ✅ Delivery Optimization Files
These options usually free up a lot of disk space without any risk.
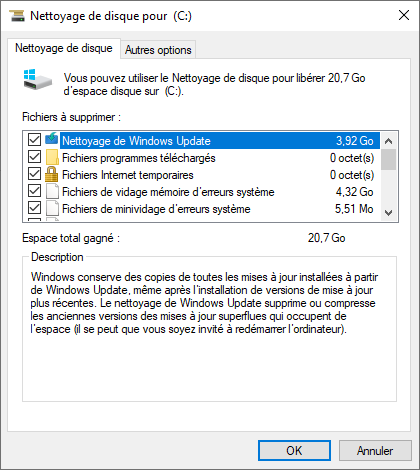
Good to know:
- Windows Update Cleanup deletes old versions of updates that are no longer needed.
- A restart of the computer may be requested after the operation.
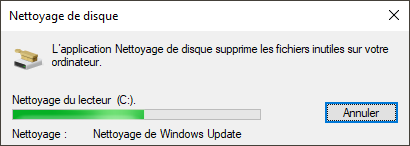
Windows Update Cleanup / Device driver packages
Explanation:
Windows is deleting the selected files.
This step can take longer, especially when cleaning up Windows updates.
It is advisable to:
- not switch off the computer,
- not interrupt the operation.
When it has finished, the window closes automatically.
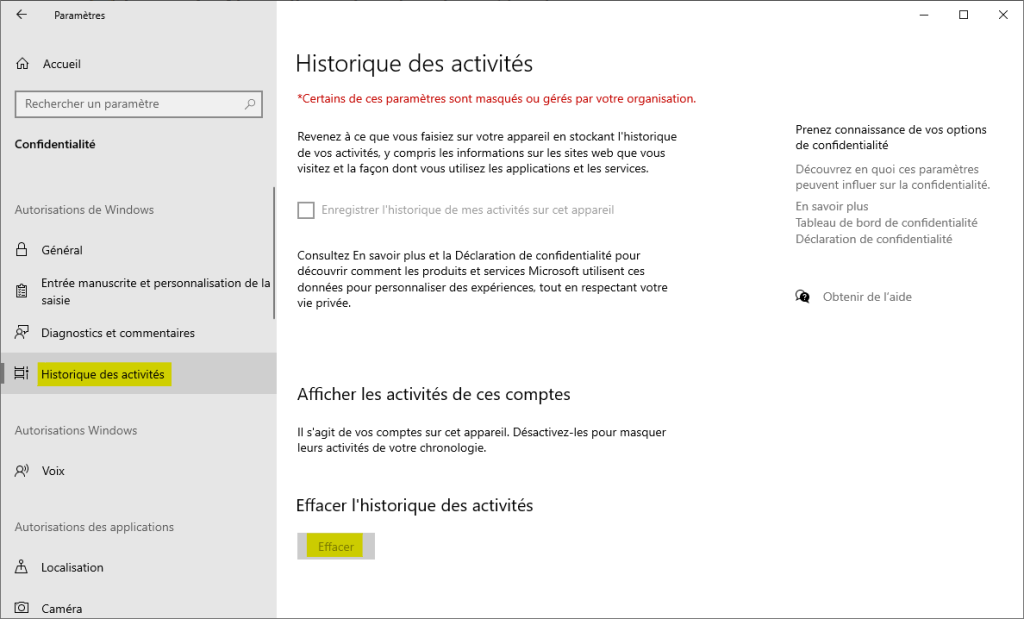
3.2 Turning off and clearing Windows activity history
If you use a Microsoft account, also check the activity history in the privacy settings of your Microsoft account (online) and clear it if necessary.
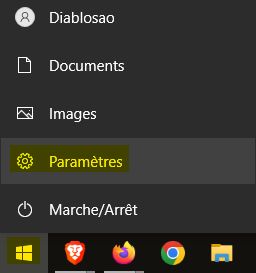
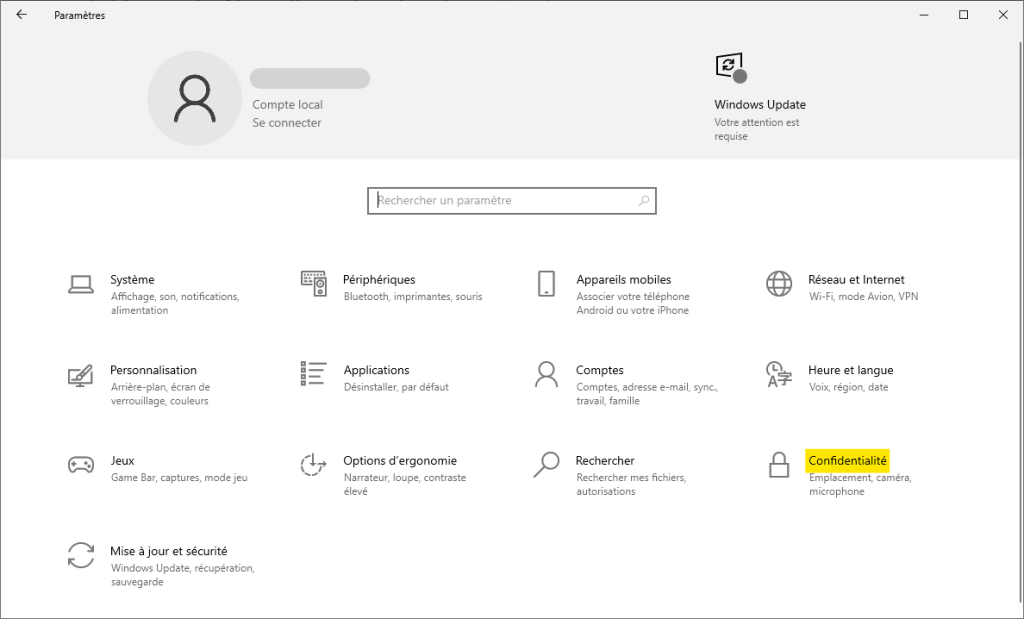
- Go to: Start button → Settings → Privacy → Activity history (on Windows 11: Privacy & security → Activity history)
- Turn the history off.
- Click Clear.
3.3 Targeted manual deletion
Delete only the contents of the following folders:
Important: only delete the contents of the folders listed, never the folders themselves.
If some files cannot be deleted, that is normal: they are simply in use.
To open these folders:
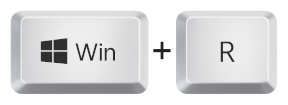
- press Win + R,
- paste the path shown,
- then confirm with OK.
%TEMP%
%USERPROFILE%\AppData\Local\Temp\
%USERPROFILE%\AppData\Roaming\Microsoft\Windows\Recent\
C:\Windows\Prefetch\
Once the folder is open:
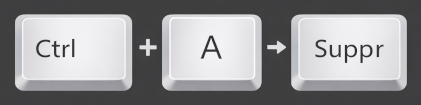
Select and then delete all the files with the keys:
Ctrl + A → Del
On some keyboards the key is labelled “Del” or “Delete” (it is the same key).
ℹ️ Cleaning out the Prefetch folder may cause a slight temporary slowdown the first time applications are launched. This folder contains optimisation files that help Windows start programs faster. Deleting its contents is not dangerous, but it can affect how quickly applications start in the short term. Clearing the contents of the Prefetch folder is optional and not recommended (not least because Windows rebuilds it and the benefit is debatable).
3.4 System logs
- Open Event Viewer
- Clear the logs if no troubleshooting is needed
To open Event Viewer:
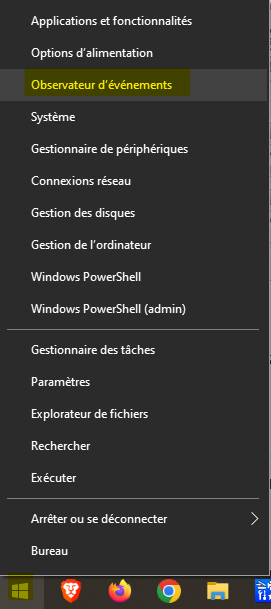
- right-click on Start (the Windows logo) with the mouse,
- then click Event Viewer.
You can also use:
- Win + R
- type
eventvwr.msc - then confirm with OK
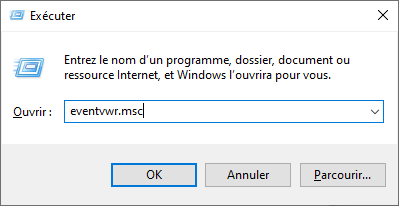
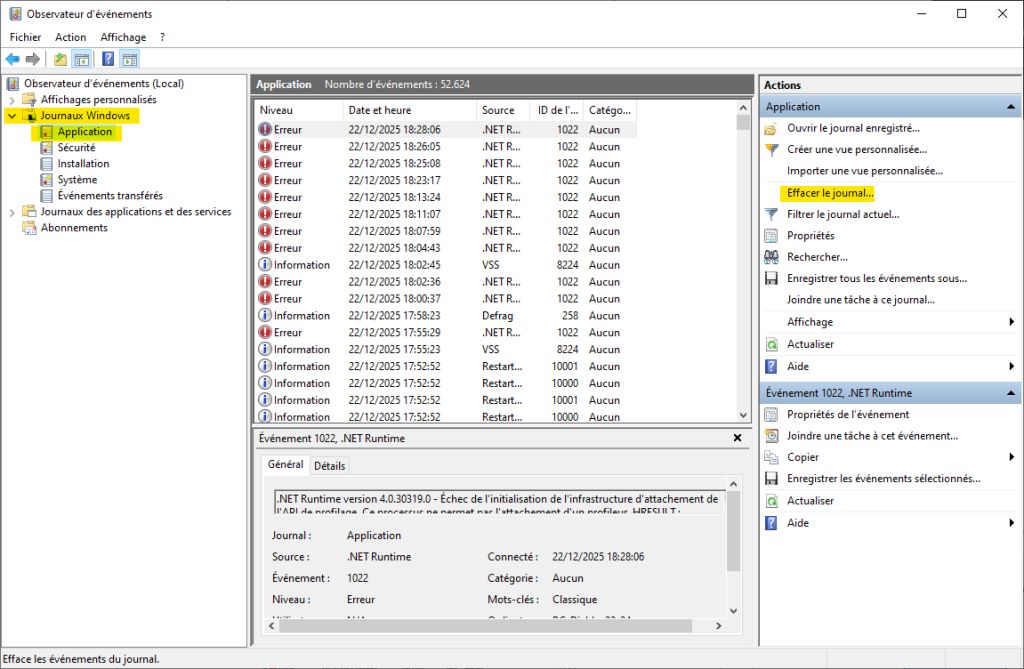
In Event Viewer, you can clear the Application, Security and System logs.
- click “Windows Logs“;
- click “Application“;
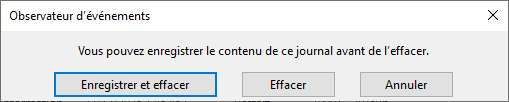
- click “Clear Log…” in the Actions pane on the right;
- in the window that opens, click “Save and Clear“;
- repeat for Security and System (and possibly Setup).
Warning
✅ Clearing the logs erases the event history (errors, sign-ins, incidents).
⚠️ This operation has no impact on how Windows runs, but it makes any later analysis harder.
3.5 Clearing web browser history
Even after cleaning Windows, Internet browsers keep their own history (visited sites, cookies, cache).
Google Chrome / Microsoft Edge / Mozilla Firefox / Brave / Opera, etc.
Each browser (Chrome, Edge, Firefox, etc.) has its own menu for deleting history, cookies and browsing data.
To avoid mistakes, open the settings of the browser concerned and follow the official procedure given by its developer.
⚠️ This may sign you out of some websites (cookies deleted), which is normal.
👉 This step is recommended if your aim is to reduce usage traces as much as possible.
3.6 Useful Windows commands (advanced)
These commands allow a deeper system cleanup.
⚠️ Use with caution and only if you know what you are doing.
Open PowerShell with administrator rights before running these commands.
Flush the DNS cache:
Deletes the DNS entries held in memory (recently visited sites).
No impact on how Windows runs.
ipconfig /flushdnsClear all system logs:
Erases all the Event Viewer logs.
Only use in a controlled context (audit, full cleanup).
wevtutil el | ForEach-Object { wevtutil cl $_ }Only run this if you know exactly what you are doing. A backup is recommended.
4. Risks and good practice
Even though the methods described in this article are commonly used, it is important to follow some good practice to avoid any problems.
Possible risks
- Cleaning out the Prefetch folder can cause a slight temporary slowdown the first time applications are launched.
- Deleting the system logs erases history that is useful for troubleshooting if a problem occurs later.
- Cleanup tools that are too aggressive or badly configured can delete settings that some software needs.
Recommended good practice
- Delete only the contents of the folders listed, never the folders themselves.
- Ignore files that cannot be deleted (they are simply in use).
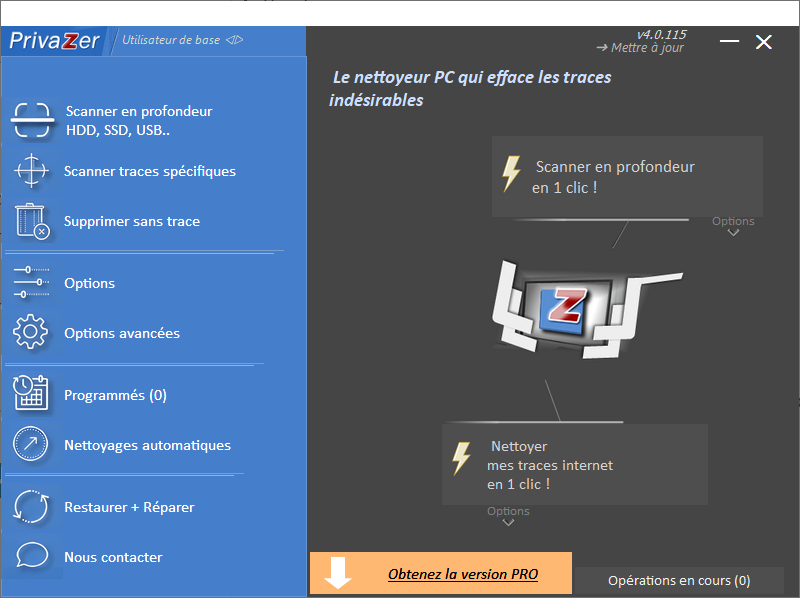
- Avoid automatic or “one-click” cleanup tools.
- Never modify the Windows registry without a specific purpose.
- Create a system restore point before a deep cleanup.
- If in doubt, prefer a complete reinstallation of Windows to a manual cleanup.
👉 If you follow these rules, the cleanup remains safe, controlled and without any impact on system stability.
5. Recommended tools for a complete cleanup
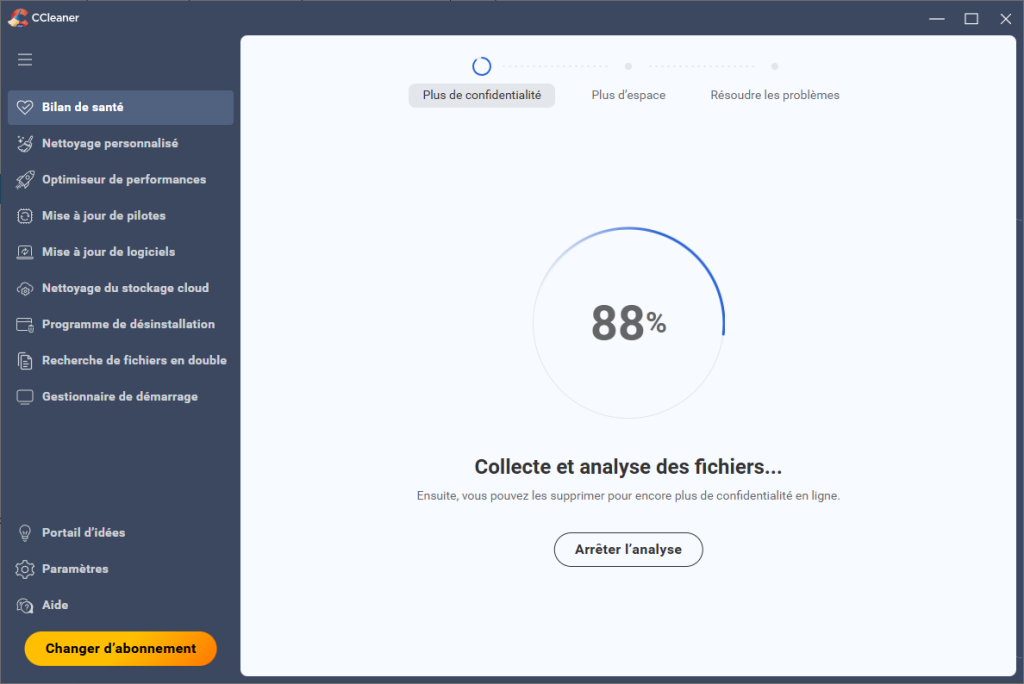
5.2 CCleaner (with caution)
Best kept for less technical users, with manual configuration.
- Easy to use
- Free version is enough
To turn off:
- Automatic cleaning
- Background monitoring
- Registry cleaning (avoid)
A popular cleanup tool, but one to use with caution. During installation, CCleaner may automatically install an Internet browser made by the same publisher (based on Chromium) if certain options are left ticked by default.
It is therefore essential to read each installation step carefully and to untick any additional option before continuing.
Note also that CCleaner has in the past been involved in controversies over data collection and questionable installation practices, which calls for extra vigilance when using it.
6. Special case: selling or donating a computer
If you plan to sell or give away your computer, simply cleaning up files and history is not enough.
The recommended method is to use a full Windows reset, removing all data.
Under Settings → System → Recovery → Reset this PC, choose the option to remove everything.
Depending on the version and edition of Windows (Windows 10 or 11), the exact wording may vary, but the aim is the same: completely erase all personal data.
When the option is offered, select fully cleaning the drive (rather than just removing your files).
This option is designed to make data recovery more difficult than a quick removal, but it is not a guarantee of “certified” erasure in every case.
If the stakes are high (business / critical data), prefer an encrypted drive (BitLocker) followed by a reset, or erasure with a “secure erase” tool, or even physical destruction of the drive.
⚠️ Warning:
This operation is irreversible. Be sure to back up your important documents before starting the procedure.
7. A note on GDPR and business environments
In a business context, removing traces aims to reduce the risk of personal data leaks when a computer is sold, donated or reassigned.
The actions described in this article are a reasonable technical measure, but they do not replace:
- a complete reinstallation of the system,
- or an overall security policy.
Each organisation remains responsible for assessing its own legal obligations.
8. Conclusion
Windows keeps many traces of use, but you can remove the vast majority of them by combining:
- targeted manual cleanup,
- reliable tools,
- and good practice.
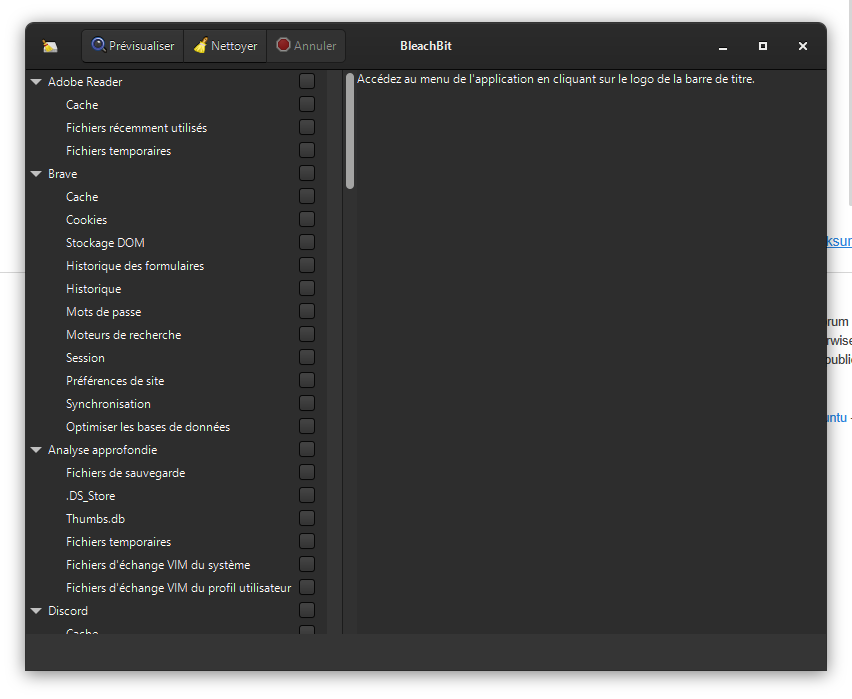
For business use, BleachBit + manual cleanup offers an excellent balance between effectiveness and security.
Important information
This guide is meant to help you understand and apply common cleanup methods on Windows.
Depending on the Windows version, the software installed and the updates, some menus or options may differ.
If in doubt (or if the computer is to be sold or given away), the most reliable solution remains a complete reinstallation of Windows or help from a professional.
Need help with a complete cleanup?
Would you rather avoid any mistakes? IAV cleans or reinstalls your computer on site, remotely or in the workshop: see our IT repair service. Tell us what you need using the contact form.
Parting with the device? Also read why recycling a used computer without destroying the drive is risky.
IAV S.à r.l. - depuis 2008 - iav.lu
Would you like to help us?
If you found this article useful, you can support us by leaving a review on Google Maps:
Click here to leave us a review. Thank you!